Need any help or advice?![]() Contact Us
Contact Us
VIDEOS IN THIS SERIES
This video is part 3 of a 3 part series: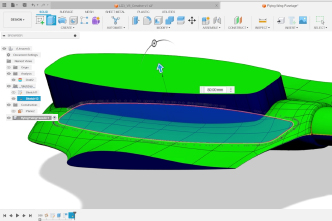

USED IN THIS PROJECT
Although not necessarily an exhaustive list, the following tools and materials, supplied by Easy Composites, were used in this project.
The quantity shown below is the approximate amount used in the project rounded up to the nearest available kit size or quantity.
TOOLS & EQUIPMENT
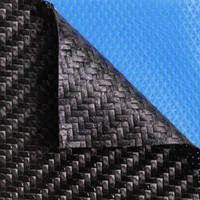
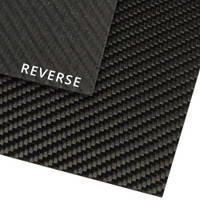
COMPONENT MATERIALS
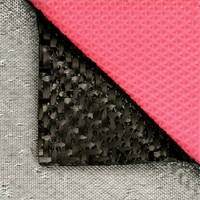
VACUUM BAGGING CONSUMABLES

ANCILLARIES
VIDEO TUTORIAL
Molding Complex Hollow Carbon Fiber Parts with Silicone Intensifiers
Advanced level composites video tutorial outlining the process of laminating and vacuum bagging a complex, hollow carbon fiber part, including the use of silicone intensifiers to achieve proper consolidation in challenging areas.
As well as the main molding, the guide also covers bonding in the internal structure including longerons, bulkheads, and spars to complete the fuselage for a flying wing drone.
WHAT YOU WILL LEARN
Overview
- What materials and laminating process are best for complex, hollow structures.
- How to use silicone intensifiers in difficult-to-bag areas.
- How to use 'laps' to provide strength across mould sections, where access is restricted.
- Techniques for mould closure without trapping 'laps'.
- How to vacuum bagging hollow components.
- How to easily create an ultra lightweight sandwich panel.
- How to bond aircraft internal structures.
Material Process & Selection
To create a hollow carbon fiber part, a split mold is essential. This drone fuselage uses a four-piece mold made from XT135 tooling prepreg, including MB1 mold bushes for alignment and secure clamping.
Although other composites processes, including basic hand lamination, would be possible, complex components requiring split-molds are easiest to produce using prepreg carbon fiber which allows for accurate cutting of the reinforcement, including overlapping sections to make the join between mold sections, known as ‘laps’.
Sharp, detailed areas like the wing’s trailing can be very difficult to vacuum bag, potentially leading to bridging and pinholes or poor consolidation. Silicone intensifiers can be used in these areas to simplify bagging and ensure proper consolidation.
STEP-BY-STEP GUIDE
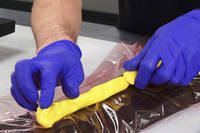
1. Preforming Intensifiers
Silicone intensifiers are normally co-cured alongside the prepreg laminate on first use but in this example, the intensifier will be preformed and cured without any reinforcement in the mold. Doing so means that the shape of the intensifier does not allow for any material thickness, thereby exerting additional pressure on these areas when the mold halves are clamped together, however, this is only possible on thin laminates of 1mm or less.
Release film is applied to the mold surface to prevent silicone adhesion. INTENSIL 40 is molded into the basic desired shape, trying to avoid air voids in the silicone. The mold is closed and the silicone is shaped from the inside to ensure good consolidation and to feather the edges of the intensifier, which could otherwise cause bag bridging of their own.
The silicone is then covered in release film, vacuum bagged in the normal way and cured at 120°C for one hour.
Once cured, the silicone intensifiers, which are reusable indefinitely, can be removed from the mold and are ready for use.
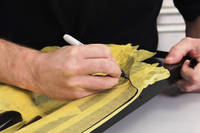
2. Cutting Templates and Lap Strategy
Templates are made by covering the mold's surface with masking tape, marking cut positions, and transferring these to a flat backing material which is cut to shape to make the basic templates.
To tie the two halves of the component together, ‘laps’ can be used. This is where the reinforcement on one side of the mold extends past the edge of the mold, whilst the corresponding ply on the other side of the mold is reduced accordingly. When the mold halves are brought together, layers of reinforcement extend across the split line without affecting the laminate thickness in these areas. This approach ensures strong, seamless joints without requiring internal access for taping.

3. Reinforcement Kit Cutting
Use the templates to cut the kit of prepreg carbon fiber reinforcement.
The kit for the first ply is cut exactly to template because this ply will finish flush with the edge of the mold. When cutting the kit for the second ply, adjust the templates to include the lap strategy, extending some templates and shortening the opposing templates by the same amount.
The silicone intensifiers can also be used as templates and should be extended appropriately.
4. Laminating the Prepreg
Before starting to laminate the prepreg reinforcement into the mold, ensure that the molds are correctly prepared with a suitable release agent, such as Easy-Lease CR1 Chemical Release Agent.
Laminate the first ply into the upper and lower halves of the mold paying close attention to avoid avoiding bridging of the laminate, especially in tight corners. The reinforcement is then carefully trimmed flush with the perimeter of the mold using a scalpel, being careful to present a flat blade to the mold’s flange in order to avoid damaging it.
The second plies are then laminated into the mold. On one side, the reinforcement will extend 10mm past the edge of the mold, on the other side, it will be 10mm short of the edge.
The barriers are attached to the lower half of the mold and the reinforcement for the wing roots, which includes a 10mm extension lap all round, is laminated into place.
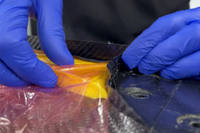
5. Positioning Intensifiers and Closing the Mold
The silicone intensifiers for the wing root are wrapped in release film to make them easy to remove and to prevent degradation of the silicone during the cure. They are then placed firmly against barriers and the top lap is folded over ready for mold closure.
The extended lap around the perimeter of the mold is gently folded in ready for closure and can be held in position using some flash release tape.
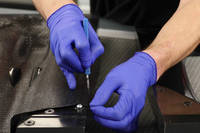
Carefully bring the two mold halves together, looking where possible to ensure that the laps are still correctly held folded into the cavity within the component. Once the molds are together, the release tape can be slid out, allowing the laps to unfold up onto the opposite side of the mold. Check no laps are trapped between the mold halves and clamp the molds together through the mold bushes.
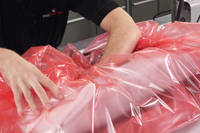
6. Vacuum Bagging and Cure
Bagging hollow parts requires a vacuum bag that is sufficiently large to allow it to reverse in on itself inside the mold. Great care must be taken to ensure that the bag is following all of the contours without bridging or stretching, although this is made much simpler with the intensifiers taking care of all of the most difficult areas.
Once bagged, the part is loaded into the oven and cured using the standard XC110 cure cycle under full vacuum.
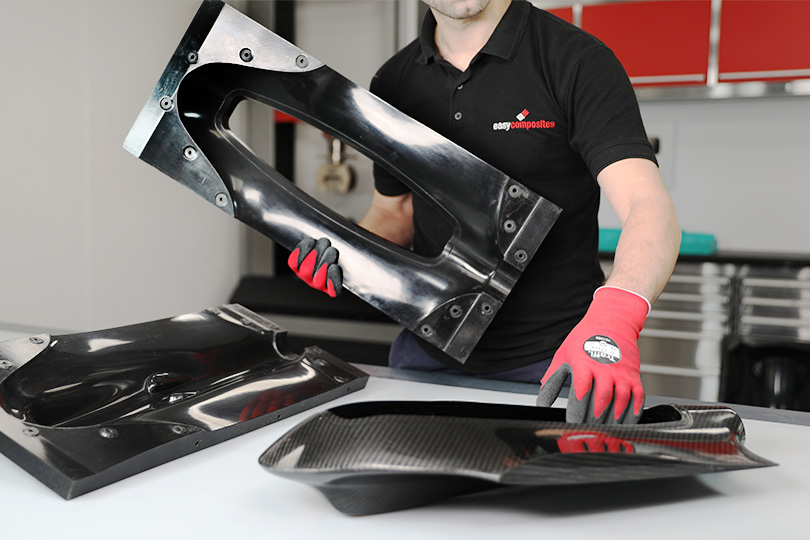
7. Demold and Trim
Once cured, the barriers are removed, the mold sections unbolted and the part can be removed from the mold.
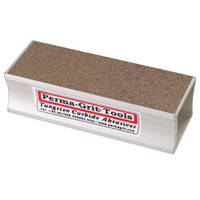
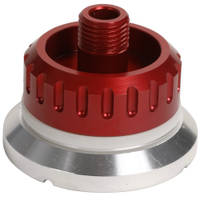
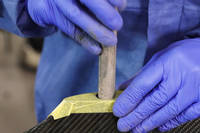
Remove the resin flash and fettle the edge smooth using Perma-Grit sanding blocks and abrasive paper. The hole for the spar tube is cut using a Perma-Grit rotary tool.

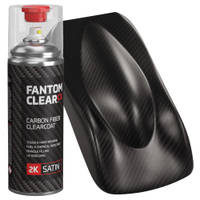
8. Clearcoat Paint Finish
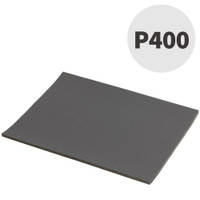
Prior to paint, the part is keyed with 400 grit abrasive paper and thoroughly cleaned and degreased using soapy water.
A single coat of Fantom Clear CX, followed by a light flattening and a final finishing coat results in an exceptional satin finish whilst adding only around 10g of weight.
DISCUSSION (0)
Please share any questions or comments you may have about this video tutorial.
LEAVE A COMMENT OR QUESTION
USED IN THIS PROJECT
Although not necessarily an exhaustive list, the following tools and materials, supplied by Easy Composites, were used in this project.
The quantity shown below is the approximate amount used in the project rounded up to the nearest available kit size or quantity.
TOOLS & EQUIPMENT
COMPONENT MATERIALS
VACUUM BAGGING CONSUMABLES
ANCILLARIES
DISCUSSION (0)
Please share any questions or comments you may have about this video tutorial.
LEAVE A COMMENT OR QUESTION
100% SECURE
PAYMENT METHODS


Easy Composites Ltd, registered in England 7486797. All content copyright (C) Easy Composites Ltd, 2025. All rights reserved.