Need any help or advice?![]() Contact Us
Contact Us
USED IN THIS PROJECT
Although not necessarily an exhaustive list, the following tools and materials, supplied by Easy Composites, were used in this project.
The quantity shown below is the approximate amount used in the project rounded up to the nearest available kit size or quantity.
REINFORCEMENTS
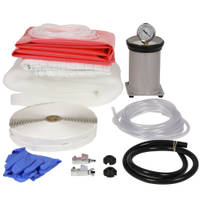
INFUSION EQUIPMENT & CONSUMABLES
VACUUM BAGGING CONSUMABLES
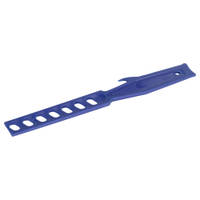
TOOLS & EQUIPMENT

MATERIALS & CONSUMABLES


VIDEO TUTORIAL
Beginner's Guide to Carbon Fibre Resin Infusion
For professional and high quality parts, resin infusion is one of the main methods of constructing these parts. It gives great performance and lightweight parts with a minimal amount of specialist equipment and can be cured at room temperature.
In this guide to resin infusion, the topics covered will include:
- How Infusion Works
- Materials Needed
- Suitable Mold Types
- Layup of the Carbon Fibre
- Infusion Stack
- Running the Infusion
- Demolding and Finishing
TUTORIAL BREAKDOWN
1. Process Overview
The process of resin infusion can be summarised in that the fibers are placed dry into the mold. A bagging stack is then applied, the mold is then vacuum bagged and a vacuum pulled drawing air out of the bag. The resin is then drawn into the mold by the vacuum and it saturates all the fibers. The part is then allowed to cure at room temperature.
Properly made infused parts will have a perfect resin fiber ratio and will mechanically perform very well, rivalling parts made from pre-preg. They have the advantage of being both cosmetically and mechanically superior than hand laid parts. Also, as the resin is introduced at the end of the process, it is very clean and contained.

2. Equipment & Materials Overview
Using the right materials and equipment is essential to perform the infusion successfully. Once you have a mold made, this is a list of the basic materials and consumables used in the infusion process:
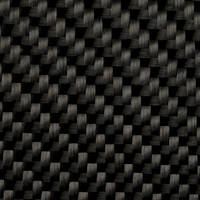
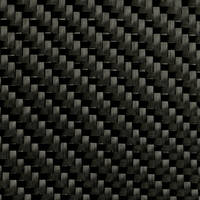
- Fabric Reinforcement - Commonly carbon fiber, but a range of woven materials can be used.
- Spray Adhesive - Except for very flat moulds, used to help position and hold fabric in place.
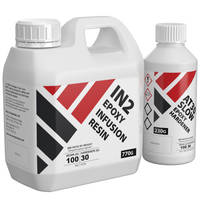
- Infusion Resin - Low viscosity infusion grade resin helps the flow and wetting out of the fibers.
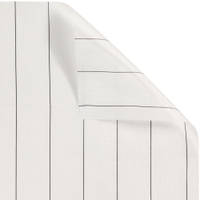
- PP180 Peel Ply - Allows resin to flow through and is easily removed from the finished part.
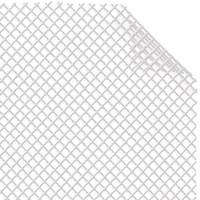
- FM100 Infusion Mesh - Creates flow channels for the resin across the fabric surface.
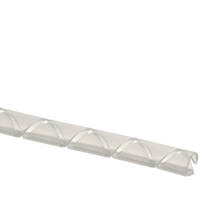
- Resin Infusion Spiral - Creates a fast flowing resin channel for distributing resin.
- Infusion Silicon Connector - Used for both resin inlet and vacuum connections.
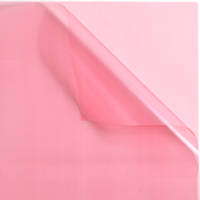
- VB160 Vacuum Bagging Film - 50 micron film used to create the bag itself.
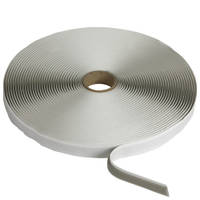
- ST150 Bag Sealing Tape - Used to seal the vacuum bag to the mould flanges.
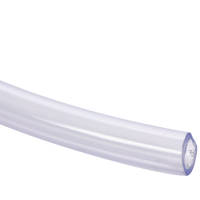
- PVC Hose - Disposable resin feed and vacuum line hose.
One of the advantages of resin infusion is it does not need much equipment to complete the process successfully. The following items are the common equipment needed:
- Vacuum Pump - Capable of achieving 5mbar (~99.5%) or better level of vacuum.
- Catch Pot - Needed to catch any resin coming from bag to protect the pump.
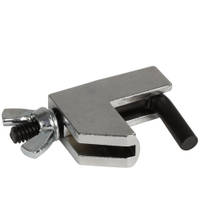
- Line Clamps - Used to clamp off resin feed and vacuum lines.
- Release Agent - Prevents part sticking to the mould.
- Mixing Buckets & Sticks - For holding and mixing resin.
- Nitrile Gloves - PPE to protect hands.
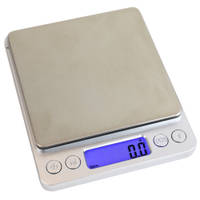
- Digital Scales - For accurate measuring of resin and hardener.

3. Preparing the Mold
For the process, you will need a suitable mold. Typically the majority of these will be made by taking a mold from the original part or a pattern. A key point worth noting is that for resin infusion, a larger flange is needed to provide space for the bagging process and bagging stack. Typically around 100mm (4") should be enough. Although it is possible to use a smaller flange, it will make the layup more difficult.
The infusion process is conducted at room temperature which means you have a wider range of mold making materials. We generally would recommend the Uni-Mould Tooling System due to its great value and ease of use. You can see a tutorial video for the Uni-Mould System here: Uni-Mould Tooling System User Guide
At this stage the release agent is applied, we recommend a chemical release, such as our CR1, for the superior release performance. The ST150 gum tape is then applied around the flanges while the flanges are clean and free from any stray fibres. The mold is then ready for use.
4. Laying the Reinforcement
For this specific part, the 210g twill carbon fabric is used for the surface layer. To back up, one layer of 650g carbon fiber is used as it will have the same thickness of approximately 3 layers of the 210g cloth. The fabrics are then cut out, allowing around 100mm extra to allow for positioning error.
The fiber is then positioned on the mold using a light dusting of the Fusion Fix EP to hold in place. This is done for both layers taking care to ensure the fibers are properly pressed into the corners and detail.
5. Infusion Consumables
From this point forward, the process is now focussed on facilitating the infusion process. This includes making the bagging stack by laying the infusion consumables into the mold.
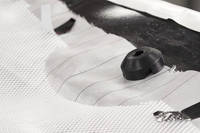
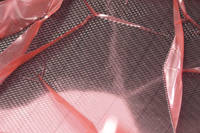
The first part of the stack is the peel ply. This is then followed up by the infusion mesh which enables the resin to flow over the part. Once the mesh is down, it is important to consider where you want to place the infusion connectors and infusion spiral for best flow of the resin to ensure the part is fully infused. Following the rules in the demonstration and the shown examples, it should be easily possible to plan the best way to ensure the part will wet out with resin fully.
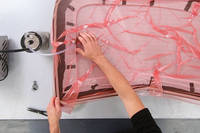
6. Seal and Pull Down Vacuum Bag
A very high level of vacuum is key to making the infusion process work which means that the vacuum bagging stage is the most critical stage of the lay up. It is essential to get a leak free bag, and you should not start the infusion until the bag is leak tight. We have a specific video covering how to make a sealed vacuum bag which can be watched here: How to Find, Fix and Avoid Leaks in Vacuum Bags
The bagging film is sealed to the mold flange, using pleats as needed to allow sufficient excess to ensure enough film to fill all the detail without bridging. The PVC hose is then inserted into the Infusion Silicone Connectors and sealed in place with gum tape. The hose can be connected to the pump and the vacuum pulled on the bag, adjusting the film as needed. The drop test can then be conducted to ensure the bag is leak free.
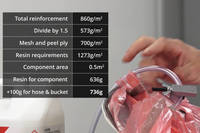
7. Calculating Resin Quantity
Now we are ready to mix the resin and perform the infusion itself. To work out the amount of resin needed, first calculate the weight of the layup per square meter. Once this figure is known, it is divided by 1.5 to give the actual amount of resin needed in the laminate. 700g per square meter is added to allow for resin consumption of the peel ply and mesh.
That then gives the resin total per square meter. This figure is then multiplied by the surface area of the mold to give the actual amount needed for the size of the mold. 100g is then added to that total to allow for resin in the hoses and bottom of resin feed pot.
8. Running the Infusion
At this stage the infusion itself is ready to be performed. The correct amount of resin is measured out and thoroughly mixed. The hose is inserted into the mixing bucket and taped in place to prevent movement.
The infusion resin can now be allowed to flow - open the line clamp slowly allowing the resin to flow up to the clamp, then after a few seconds to allow air to clear out the hose, fully open and allow the resin to flow into the part and infuse across the laminate.
Once the resin has fully infused and is moving into the vacuum line hose, the vacuum line can be clamped off fully. The resin feed line is then left open for a short period of time to allow a little more resin in - to help improve cosmetic finish. The resin feed line can then be fully clamped and the mold and part left 24 hours to fully cure.
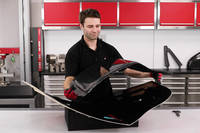
9. Demold
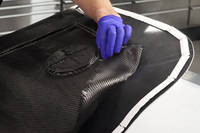
To check the part is ready for demolding, bend the resin hose - if ready it should snap cleanly - if not wait longer. The vacuum bag can then be removed. The peel ply and mesh is removed by snipping the edges and pulling off in 100mm wide strips. Then the part can be demolded with the help of demolding wedges.
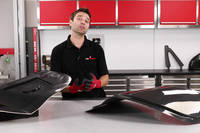
The high quality of the mold has translated into a high quality finished part and with the infusion process completed correctly, has given a flawless pinhole free finish. The part is then trimmed and finished off ready for use. The finished part is less than a quarter of the weight of the original part.
DISCUSSION (0)
Please share any questions or comments you may have about this video tutorial.
LEAVE A COMMENT OR QUESTION
USED IN THIS PROJECT
Although not necessarily an exhaustive list, the following tools and materials, supplied by Easy Composites, were used in this project.
The quantity shown below is the approximate amount used in the project rounded up to the nearest available kit size or quantity.
REINFORCEMENTS
INFUSION EQUIPMENT & CONSUMABLES
VACUUM BAGGING CONSUMABLES
TOOLS & EQUIPMENT
MATERIALS & CONSUMABLES
DISCUSSION (0)
Please share any questions or comments you may have about this video tutorial.
LEAVE A COMMENT OR QUESTION
100% SECURE
PAYMENT METHODS


Easy Composites Ltd, registered in England 7486797. All content copyright (C) Easy Composites Ltd, 2025. All rights reserved.